Yan Cui
I help clients go faster for less using serverless technologies.
AWS announced a new feature this week that lets you enable WAF protection for Cognito user pools. And one of the things you can do with this is to implement geo-fencing and IP allow/deny lists.
Geo-fencing and IP allow/deny lists are usually implemented in the frontend as well as the backend APIs. But users (and malicious actors) can still bypass the geo-fence and IP blockade by interacting with the Cognito user pool directly. This is where the WAF protection comes in.
You can associate a Cognito user pool with a regional WAF web ACL. This can be done via CloudFormation, but you can also do it via the Cognito console (note: this only works in the “new” console experience for Cognito).
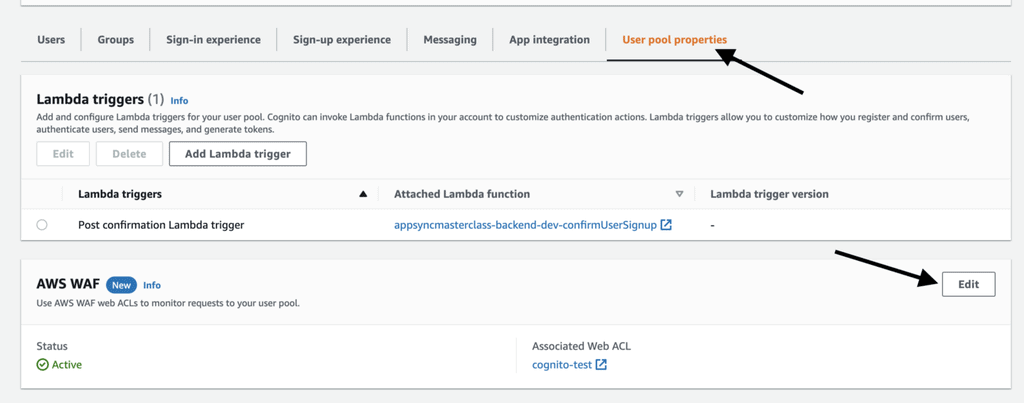
Geo-fencing
You can use geo-fencing to block users from certain countries from signing up or logging into your application.
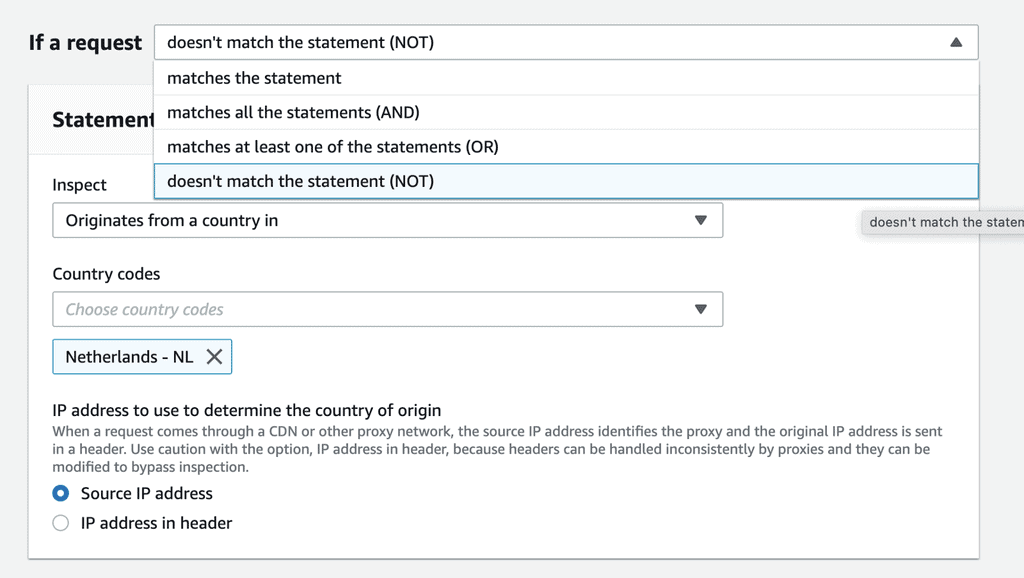
To do that, add a custom rule to the WAF web ACL like this:
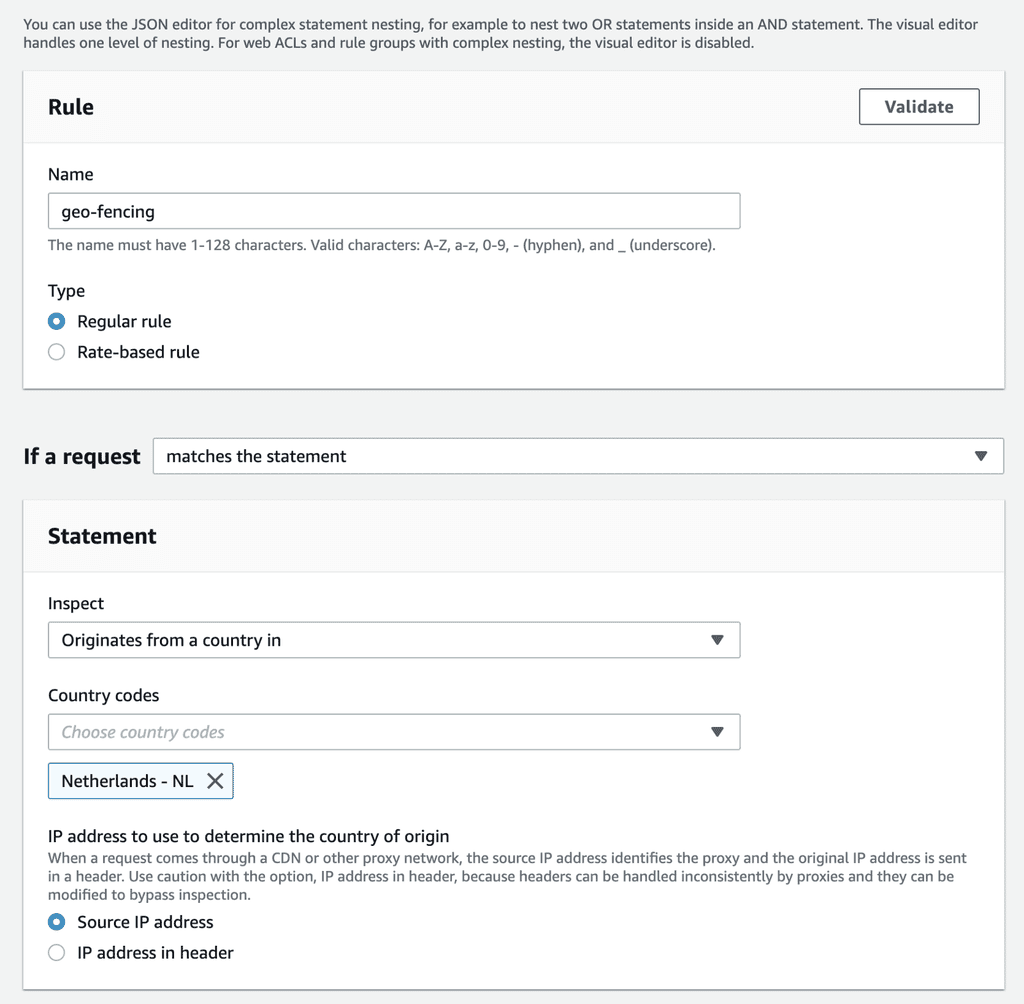
Which identifies users from the Netherlands based on their IP address.
And if you set the matched action to Block (this is the default) then the rule would forbid these users from interacting with the Cognito user pool’s public API (and hosted UI if you have configured one).
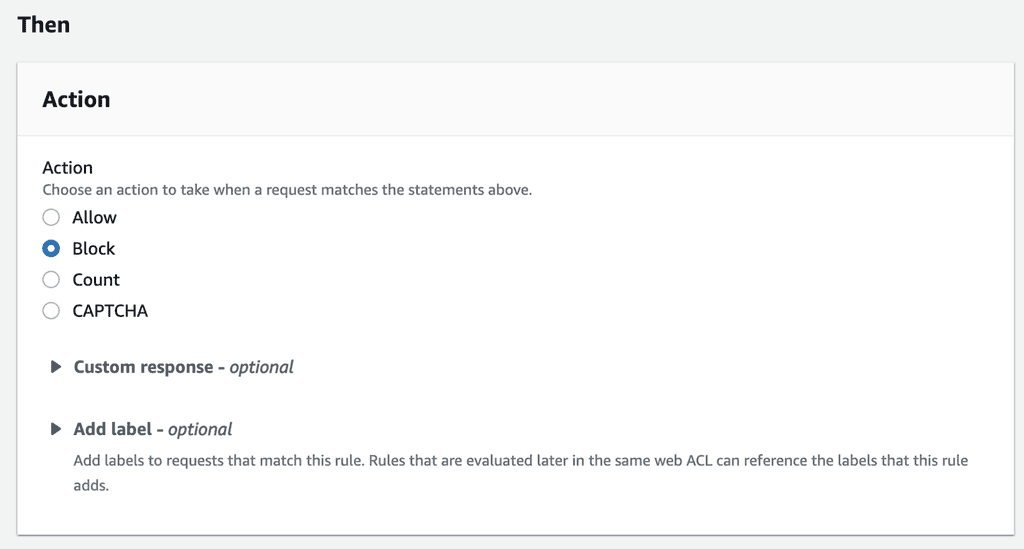
Users from the Netherlands would get a ForbiddenException like this:

This is how you can implement geo-fencing using a deny list.
Similarly, if you want to only allow users from an allowed list of countries, then change the rule to use the NOT condition.
Here, we’re matching users who are not from the Netherlands and forbidding them from accessing the Cognito user pool.
IP allow/deny list
You can also apply the same allow/deny list to individual IP addresses. This might be the case if users are only supposed to use your system inside a VPN. You can now use WAF to ensure that all traffic originates from a set of allowed IP addresses.
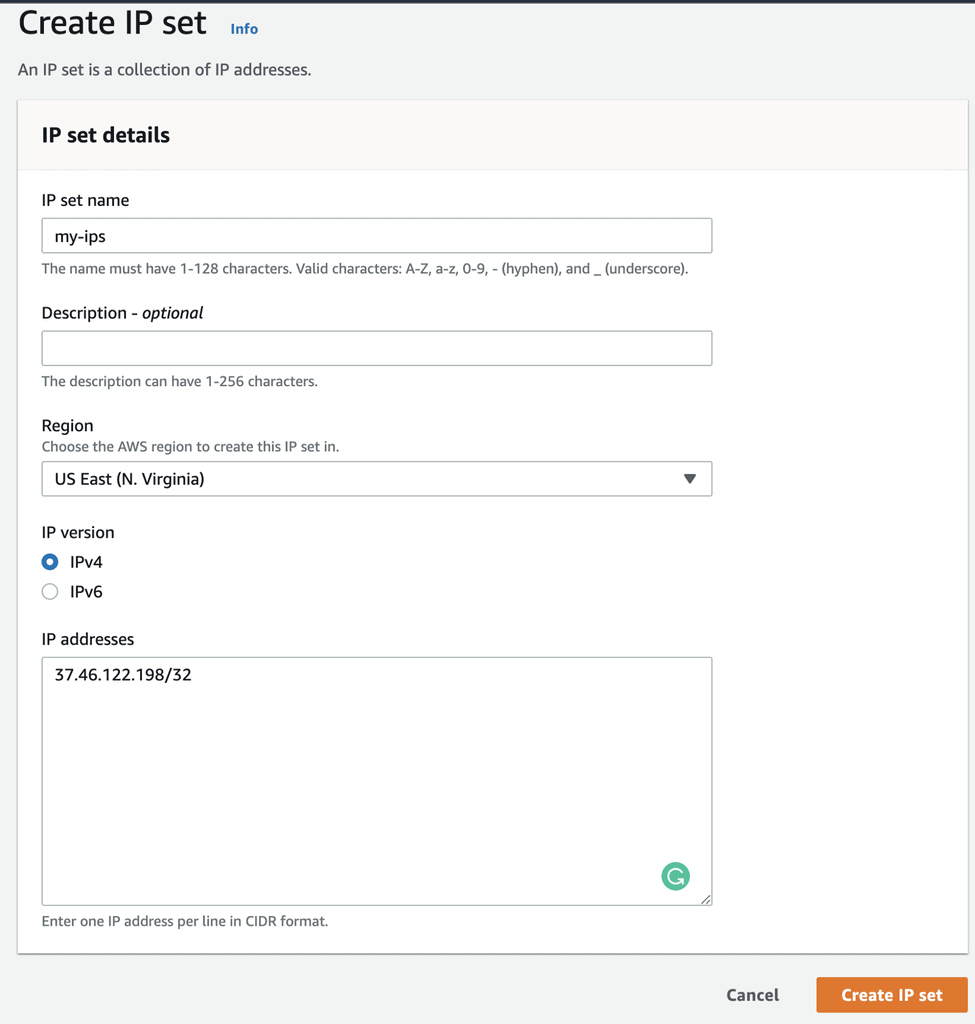
To do this, you need to first create an IP set in WAF to capture the list of allowed IP addresses.
The IP addresses must be expressed in the CIDR format, like this:
Once you have created the IP set, you can create a rule to block all traffic that did not originate from the list of allowed IP addresses.
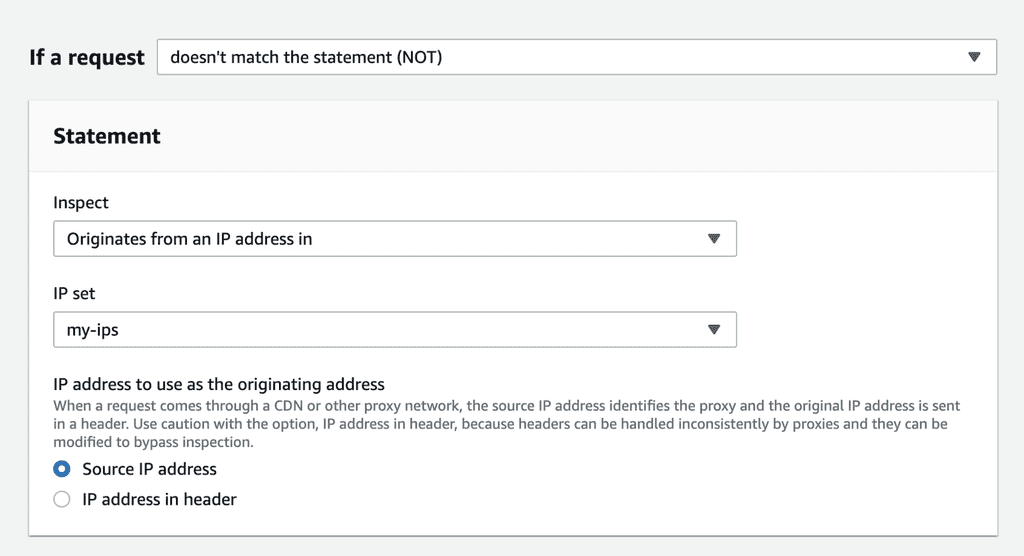
Once again, you can flip the match condition (from NOT matched to matched) to implement an IP deny list.
Dealing with VPN proxies
Geo-fencing systems can often be side-stepped by VPN proxies such as NordVPN. Luckily, WAF have you covered here as well.
You can add the managed rule Anonymous IP list to the web ACL and it’ll block traffic originating from VPN proxies, Tor nodes and even hosting providers such as AWS.
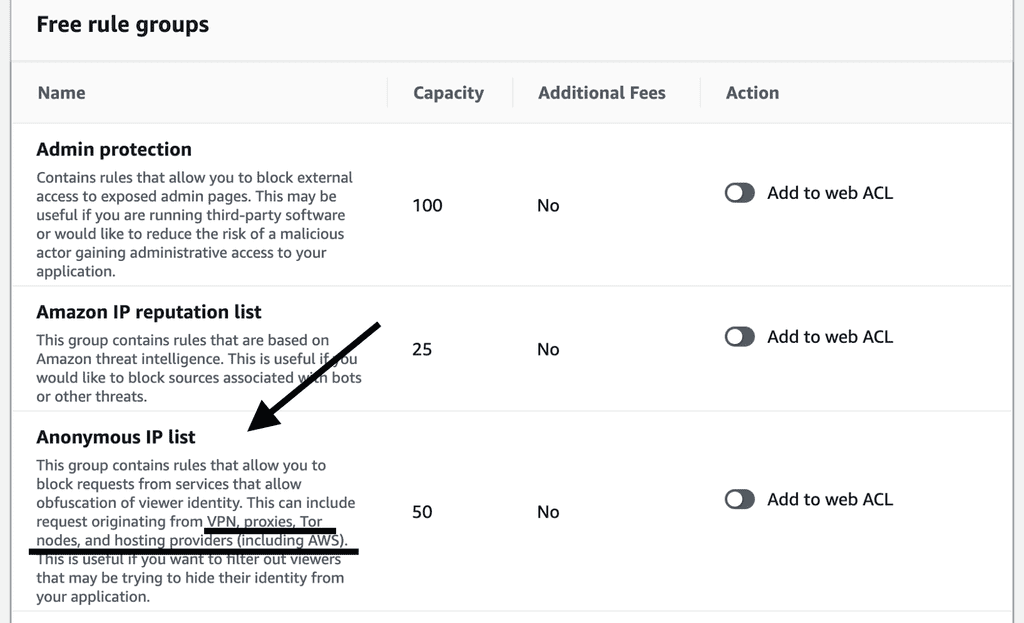
This rule works against commercial VPN proxies such as NordVPN as well as users who host their own private VPNs using EC2 instances.
I hope you find this interesting. It’s one of the new topics that we’ll be discussing in my upcoming Production-Ready Serverless workshop.
If you want to learn more about running serverless in production and what it takes to build production-ready serverless applications then check out you should definitely check it out!
In the workshop, I will give you a quick introduction to AWS Lambda and the Serverless framework, and take you through topics such as:
- testing strategies
- how to secure your APIs
- API Gateway best practices
- CI/CD
- configuration management
- security best practices
- event-driven architectures
- how to build observability into serverless applications
and much more!
Related Posts
Whenever you’re ready, here are 3 ways I can help you:
- Production-Ready Serverless: Join 20+ AWS Heroes & Community Builders and 1000+ other students in levelling up your serverless game. This is your one-stop shop for quickly levelling up your serverless skills.
- I help clients launch product ideas, improve their development processes and upskill their teams. If you’d like to work together, then let’s get in touch.
- Join my community on Discord, ask questions, and join the discussion on all things AWS and Serverless.


